It recognizes the GUI elements using the company’s proprietary technology. Object-based record replay can be done by Ranorex recorder which records the user interactions with desktop and mobiles such as mouse movements, touch keys, touch gestures, etc.,
Ranorex supports technologies as per the devices as follows:
The desktop supports applications such as WPF, .NET, WIN32, Java, MFC
Web applications such as HTML, Javascript framework, Silverlight, Ajax
Browser testings for Chrome, Internet Explorer, Microsoft Edge, Firefox
Mobile Apps like Native IOS, Native Android apps
It is a simple application that a non-coder can create and execute the results without any difficulties. In this tutorial, we will get familiar with the detailed fundamentals of this application such as settings, license, Ranorex studio, Create a solution, Record a test, Validation, Execution, and also an example project to work on.
System settings and license
To start working with Ranorex, we need to download and install the tool on our devices. The official trial version of the Ranorex automated testing tool is available on the official web page.
To download the software, do the following:
Click on the link attached, you get a webpage regarding details to be filled to download the software application.
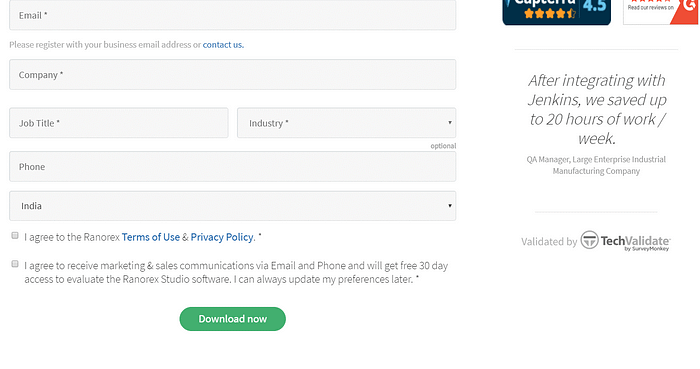
You get a form to fill as shown in the figure below.
Fill in the required details. Enable the agreement checkbox to get 30 days free trial.
Click Download now to get a link through your mail which gets access to install the application on your devices.

This tool supports both 32-bit and 64-bit operating systems. The system settings are very easy to understand and the software itself installs the complete packages to work on.
To get a license to the application, Ranorex provides the three types of premium license
- Node-locked
- Floating
- Runtime
The node-locked and floating license has the same features but floating allows you to share one or more users. Runtime license allows you to run the tests for one or more machines.
Ranorex Studio
After completing the system settings and license, you were ready to open the Ranorex Application on your device as shown in the figure below. To get started, let’s get familiar with the User interface of Ranorex software.
Ranorex Studio provides three important views.
- Project view
- Module view
- File view
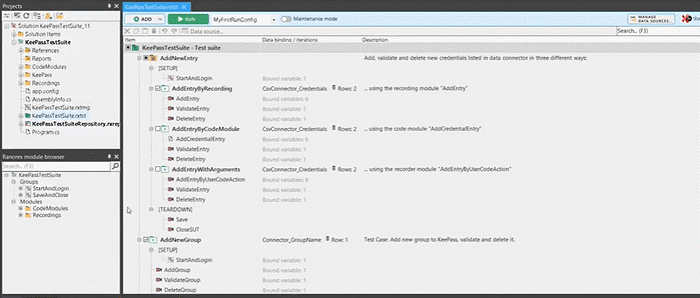
Project View: It allows you to view all the project files. On hierarchy, the Project view contains the Solution KeePass Test suite. It consists of one project, libraries, and files required to execute the project. It also allows you to work on different projects in one solution.
Module view: It allows you to execute one or more test steps. You can combine modules to create automated test series. Module Browser consists of two types.
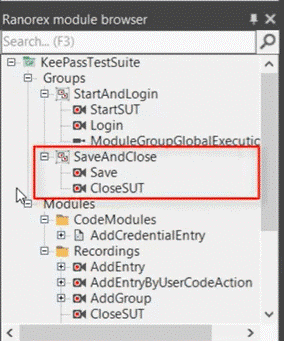
- Groups: These are organized groups which are of two types, one is StartAndLogin and other is SaveAndClose groups with their respective recordings as shown in the figure.
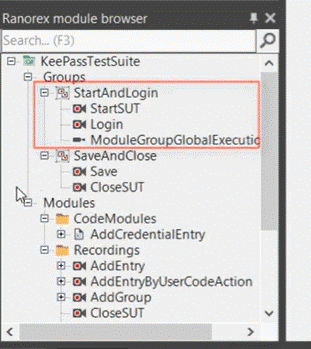
- Modules: These also consist of two types, one is CodeModule which is created and edited by automated engineers and the other is Recordings which are created by the Ranorex recorder placed in the play station as shown in the figure.


File view: When you open a project from the project view or module browser, the associate project files will open in File view. If you want to open the recordings from the module browser, you are able to view the record action on this view.

Create a New Solution
Now let’s create a new project to get Hands-on-experience with the application. Open the Ranorex Studio, you get the Studio Welcome screen as shown in the figure.

On the top left side of the page, you can see the Start box. Click on New test Solution using the wizard. Now you can start creating your test solution followed by the four steps as follows.
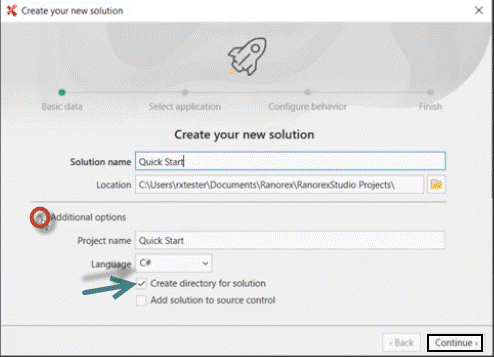
Basic Data: Here, Give your Solution test name and Location to save your test. Click on the Additional options dropdown, to check the project defaults with your Solution name. Now, Enable the checkbox to create the Solutions files within the directory structure as shown in the figures.
Select Application: You can choose from your Running application or you can browse your applications by navigating through browse as shown in the figures.
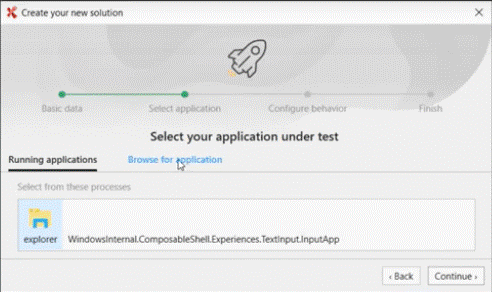
Click Continue.
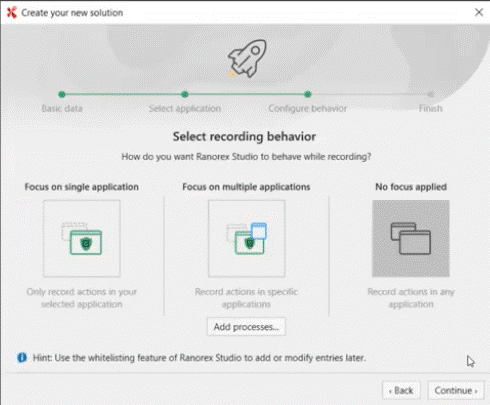
Configure Behavior: It allows you to select the recording behaviors which are of three kinds. They are:
- Focus on a single application: It ignores all the other applications during test recording except the application in which you want to execute tests. This makes your test easier to run.
- Focus on multiple applications: It allows you to select more applications to whitelist.
- No focus applied: It allows the recorder to interact with any other running processes.
Finish: It was the end of creating your solution test. Click Finish.
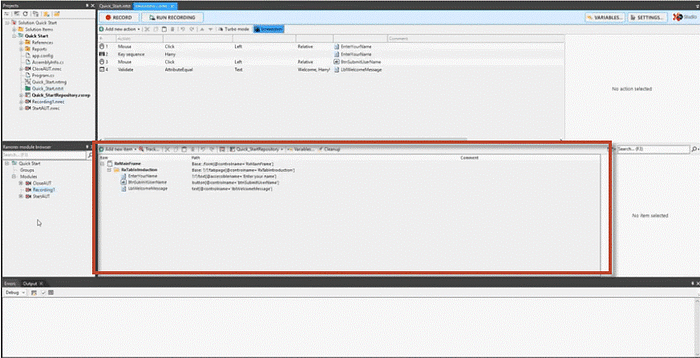
The Ranorex Studio appears with the User interface as shown in the figures.
- Module Browser consists of three modules which are Close the app, Open the app, and a single empty recording.
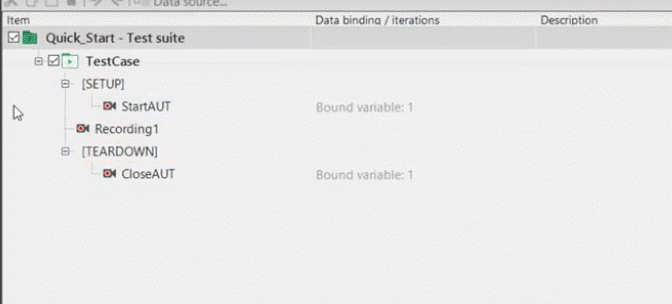
- There is also a single Test case in the Test suite on File view. Open the Test suite, you can see the Setup and Teardown region along with their respective modules for the test.
- If you run the test, You can see the Ranorex application automatically closes and opens the application under test.


Record and Validate a test
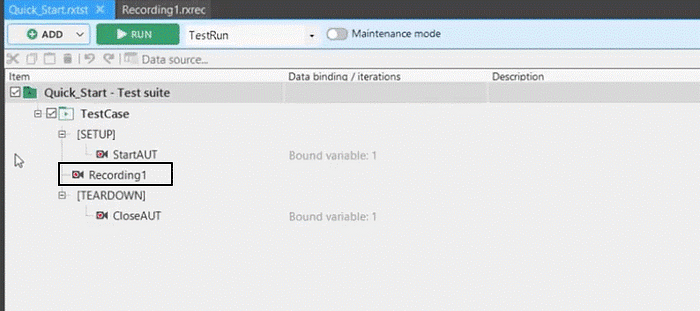
Open the Recording 1 module which is in the project file that was already created before as shown in the figure.
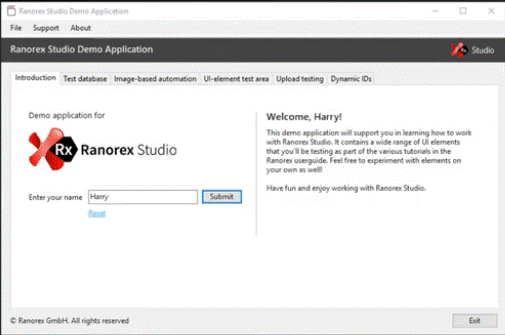
Click Record. Ranorex studio minimizes automatically.

The recorder starts recording the actions done in the application. Move your Mouse over the interface of your application to view the indication of the red dot which is recording the actions. This means the Ranorex application identifies the UI elements on your test application.
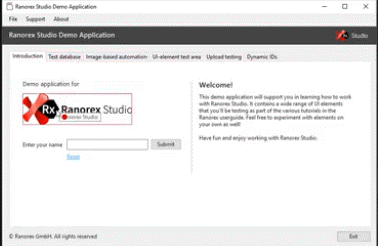
Enter your name and Submit. You can see the welcome message of your name after validation as shown in the figure.
You can also view the Ranorex recorder below the screen as shown in the figure.
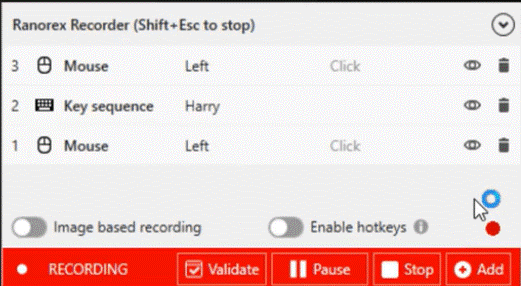
The Ranorex recorder records the actions on the screen done with your mouse and keys are listed in the recorder. The user can delete the actions, add the actions manually, or can modify the actions done on the application.
You can also enable the Image-based recordings and hotkeys to maintain shortcuts to edit or delete the actions.
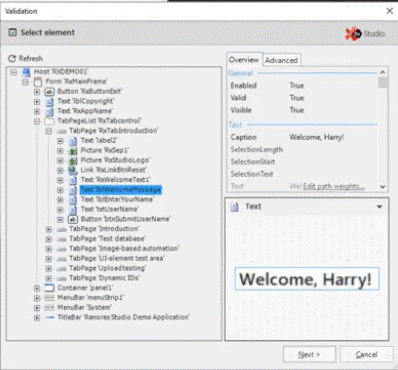
Now Validate your recordings to check your name entered and it shows your name on the welcome message.
Click on any UI, select element window opens which is to verify the UI which you are selected as shown in the figure and click on Next.
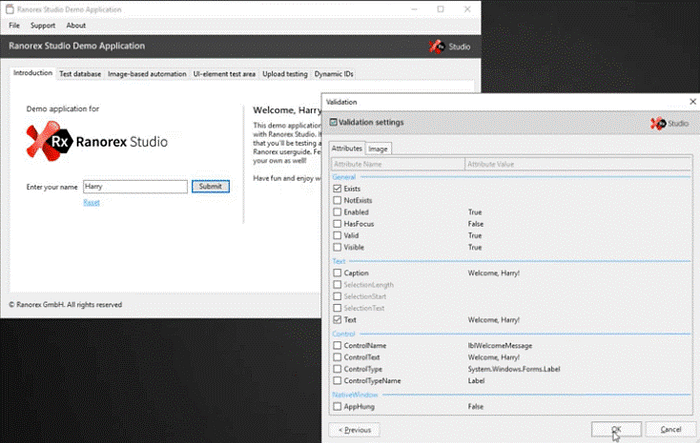
Now the Validate settings window opens, Make sure the Exists and Texts attribute checkbox to enable as in the figure.
Stop recording. Now the window redirects to the Ranorex application, you can view the actions which are recorded till now on the file view as in the figure.
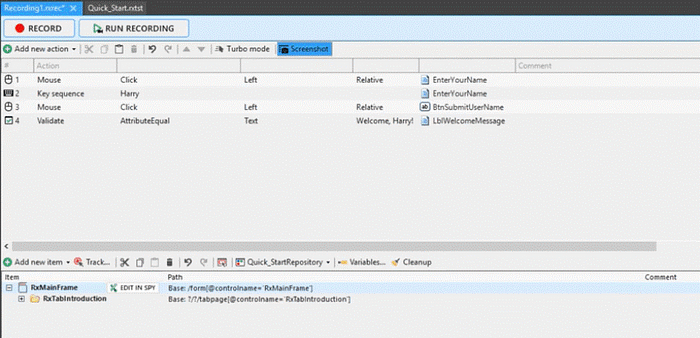
Action and Repository
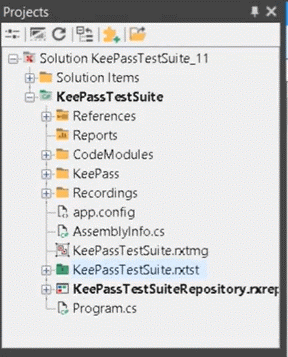
The files in the project view are organized in the hierarchy. The top one is the Solution of which the project created before. It contains a test series which has the file extension as .rxtst format. The project also contains the repository which the UI elements under the test with an extension as .rxrep format.
Open the recording in the action editor, you will find the repository items which contain the UI elements identified by Ranorex recorder as shown in the figure.
You can see the steps of actions done previously on the application.
If you want to add an action, click on Add new action on the top left of the file view to add an action manually. If you want to change your name, Click at your name and change as you wish. You can also change the sequence of your actions or you delete the unnecessary action.
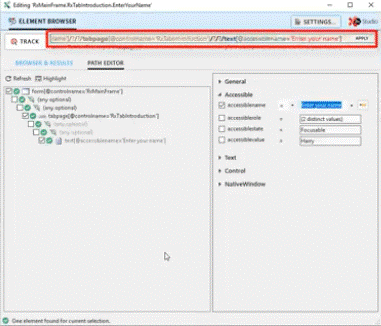
Repository elements are stored within the application while recording. Select any element and it represents the element while showing the screenshot taken by Ranorex recorder. Now click on EDIT IN SPY to check the path of the element.